
Setup Your GogoPogo Profile and Branding
Setting up your store profile and branding is an important step when launching your store on GogoPogo. A well-optimized profile helps build trust with customers and improves your store’s visibility in search engines.
In this guide, we’ll walk you through how to configure your store name, description, SEO details, and branding settings inside your dashboard.
Step 1: Go to Store Settings
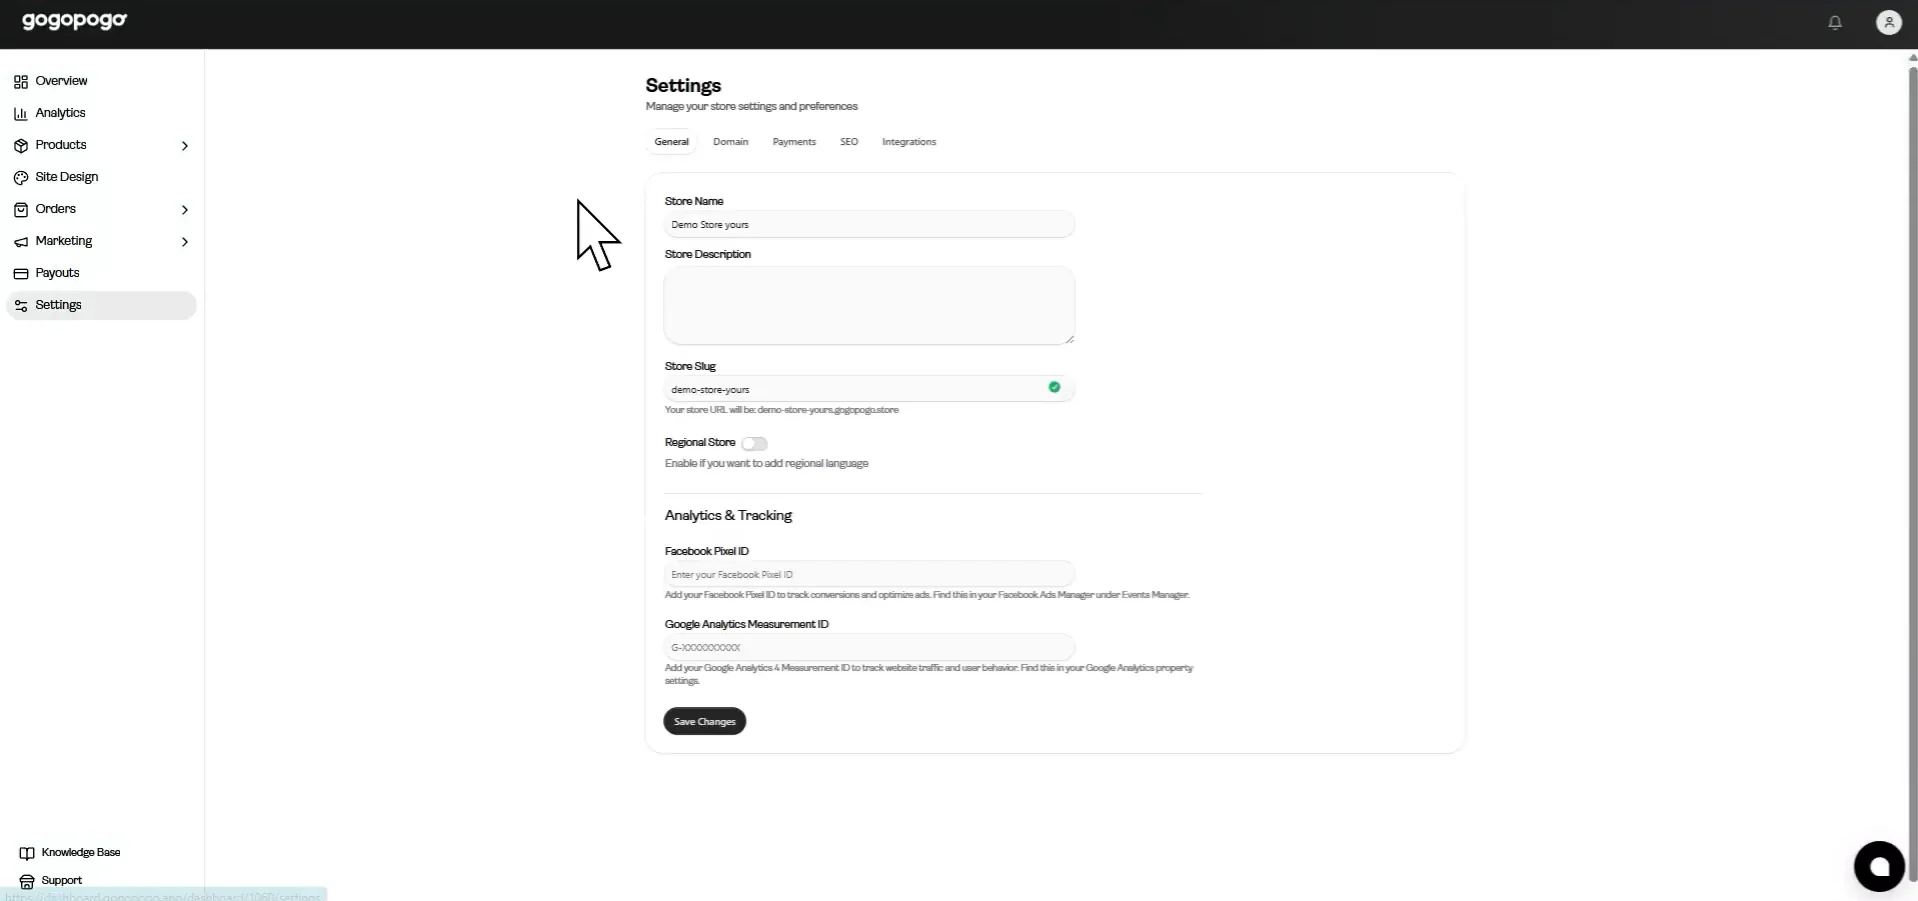
Section titled “Step 1: Go to Store Settings”After logging into your GogoPogo account, you will land on the main dashboard where you can manage your store. From there, you will see different sections on the left sidebar.
Click on Settings from the left sidebar.
Inside the Settings page, you will see several tabs such as:
- General
- Domain
- Payments
- SEO
- Integrations
Step 2: Complete the General Store Settings
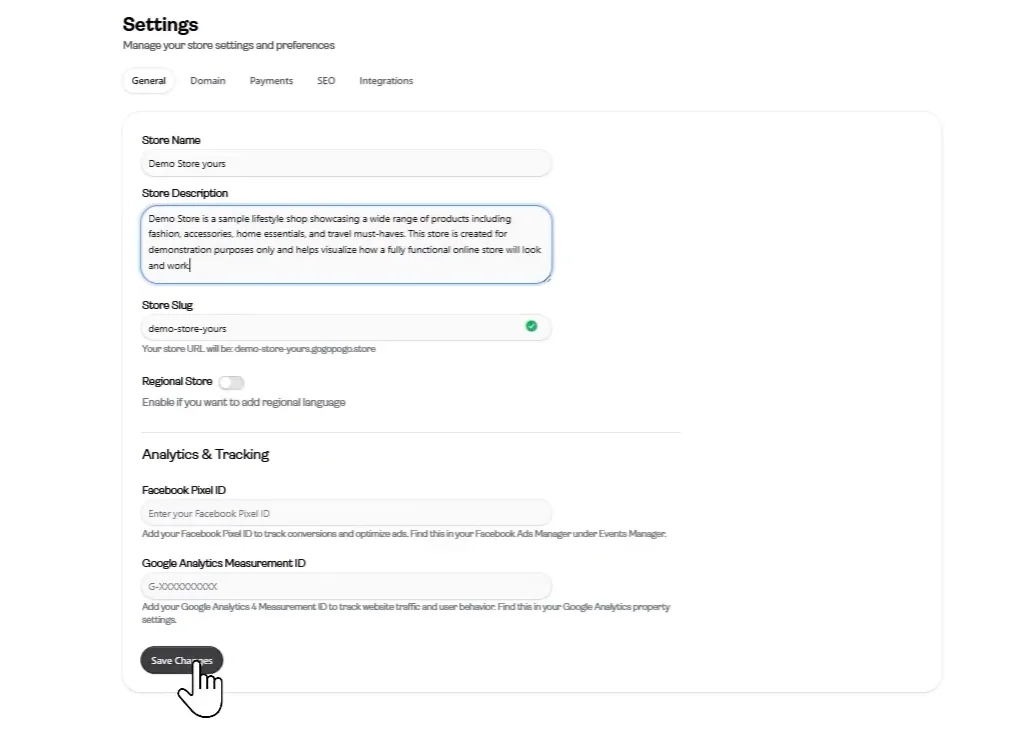
Section titled “Step 2: Complete the General Store Settings”Once you open the Settings section, you will land on the General Settings page. This page contains all the basic information required to configure your store profile.
Here you can fill in the following details:
Store Name - Enter the name of your store. This will represent your brand and will be visible to customers when they visit your storefront.
Store Description - Write a short description explaining what your store offers. This helps customers quickly understand your products or services.
Store Slug - The store slug creates your store’s unique URL on the platform.
Example: yourstorename.gogopogo.store
Regional Store Settings - You may see an option to enable regional settings if you want your store to support regional audiences.
Analytics Tracking IDs - You can also connect analytics tools for tracking store performance, such as:
- Facebook Pixel ID
- Google Analytics Measurement ID
Adding these tracking IDs allows you to monitor visitor activity and understand how customers interact with your store.
Once you have filled in all the required information, click the**“Save Changes”**button to update your store details.
Step 3: Configure Your SEO Settings
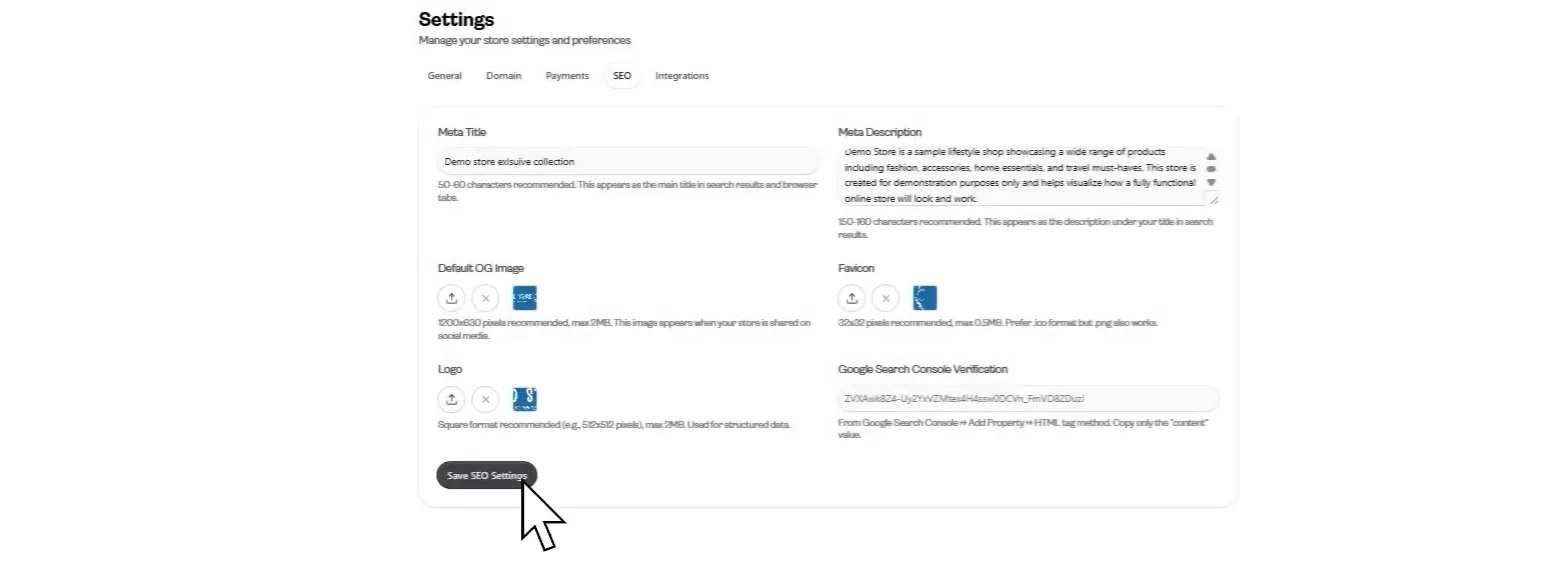
Section titled “Step 3: Configure Your SEO Settings”Next, navigate to the SEO tab in the Settings section. This page allows you to optimize how your store appears in search engines and when it is shared online.
Here you will find several fields to configure:
Meta Title - Enter the title that will appear in search engine results and browser tabs. This title should clearly represent your store and include relevant keywords.
Meta Description - Write a short description of your store. This text appears below the title in search results and helps users understand what your store offers.
Default OG Image - Upload a default Open Graph image. This image is displayed when your store link is shared on social media platforms.
Favicon - Upload a favicon for your store. This is the small icon that appears in the browser tab when someone visits your website.
Logo - Upload your store logo, which represents your brand and helps maintain a professional identity across your store pages.
Google Search Console Verification - You can also add the verification code from Google Search Console to connect your store with Google and monitor search performance.
Once all the required information is added, click “Save SEO Settings” to apply the changes.
Configuring your store settings on GogoPogo is an important step toward building a trustworthy online presence. By adding your store information, branding assets, and other essential details, you ensure that your store appears professional and consistent to visitors. Taking the time to complete these settings will help create a better experience for your customers and strengthen your store’s identity.